Author: laci (page 1 of 4)

Raspberry Pi: Run VLC on startup and play slideshow videos/pictures from folder

This tutorial about how to autostart VLC with fullscreen and play loop images/videos from a specified folder.

1. edit display.desktop file

sudo nano /etc/xdg/autostart/display.destktop


2. add the following lines, and save

[Desktop Entry]
Name=vlc
Exec=vlc --loop --fullscreen --playlist-tree /home/pi/Desktop/media/


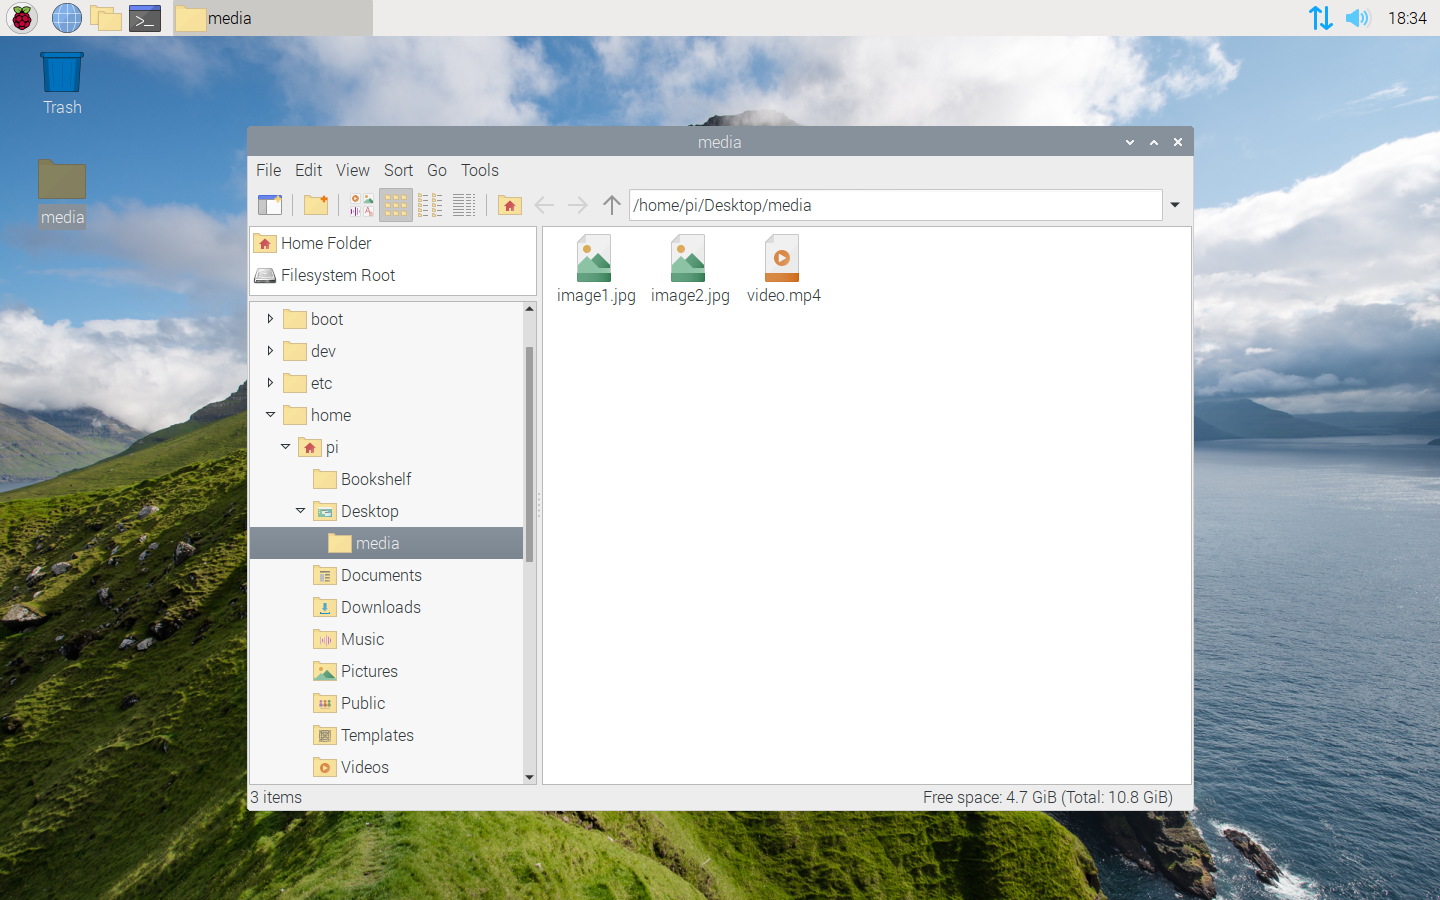
3. in this example I created a folder in /home/pi/Desktop/media, VLC automatically play images and videos from this folder.


4. VLC settings:

  • disable show media title on video start:
    Tools-Preferences-Subtitles/OSD: uncheck “Show media title on video start”
  • disable image files title on start:
    Tools/Preferences/Switch to advanced preferences/Video/uncheck Show media title on video
  • to play images automatically you need to remove “jpg” and “jpeg” from Ignored extensions:
    Tools/Preferences/Switch to advanced preferences/Playlist/Ignored extensions
  • set image slideshow duration if needed:
    Tools/Preferences/Switch to advanced preferences/Input/Codecs/Demuxers/Image/Duration in seconds
  • if you have screen tearing, or videos does not play smoothly, make sure that your video settings are correct:
    Tools/Preferences/Video:

5. restart system to test

sudo reboot

Useful things after installing Ubuntu


install multi-media codecs & MS fonts:

sudo apt install ubuntu-restricted-extras

 
enable click to minimize on dock:

gsettings set org.gnome.shell.extensions.dash-to-dock click-action 'minimize'

 
move the close/restore/minimize buttons to the left:

gsettings set org.gnome.desktop.wm.preferences button-layout close,minimize,maximize:

 
faster shutdown:

sudo nano /etc/systemd/system.conf

change and uncomment DefaultTimeoutStopSec=5s value and save, then:

sudo systemctl daemon-reload

 
fix Windows-Ubuntu dualboot causes wrong time displayed:

timedatectl set-local-rtc 1

 
Firefox settings:
close tab with double click:

about:config
browser.tabs.closeTabByDblclick true

fix volume level reduction caused by Firefox:

sudo nano /etc/pulse/daemon.conf

enable-remixing = no
flat-volumes = no


Reset SA password on SQL Server on Linux

1. stop service:

systemctl stop mssql-server

2. ensure the server is stopped:

systemctl status mssql-server

3. set new password:

/opt/mssql/bin/mssql-conf set-sa-password

4. start service and verify status of running service:

systemctl start mssql-server
systemctl status mssql-server

samba: add user to group

  1. add user to Linux system:
    adduser user1
  2. add user to samba:
    smbpasswd -a user1
  3. create group:
    groupadd group1
  4. add user to group:
    usermod -G group1 user1
  5. add user to different groups:
    usermod -G group1,group2,group3 user1

change the ownership of the folder:

chgrp group1 /path/OfYourSharedFolder

give read/write access to your shared folder:

chmod 770 /path/OfYourSharedFolder

SSH Key-Based Authentication on Debian

If you want to connect from Windows, first you need to generate rsa key files:

  1. open ZOC Tools/SSH Public/Private Key generator (you can use puttygen too)
  2. crate public/private keyfiles (id_rsa.pub, id_rsa)
  3. add content of generated “id_rsa.pub” file to: Debian server ~/.ssh/authorized_keys file
  4. edit and uncomment “PasswordAuthentication no” line in “etc/ssh/sshd_config” file
  5. now you can connect only with your generated “id_rsa” file

Music of Mali 2000

Tracklist:
01- Damon Albarn – The Djembe
02- Oumou Sangaré – Mogo Te Diya Bee Ye
03- Orchestra Baobab – Mouhamadou Bamba
04- Amadou & Mariam – Se Te Gui
05- Bassekou Kouyate – Banani (feat. Lobi Traoré)
06- Ali Farka Touré – Gambari
07- Tinariwen – Imidiwaren
08- Toumani Diabaté – Cheikhna Demba

Install and configure SAMBA

1. Install samba:

sudo apt install samba

2. Adding samba user and password: (must be existing user in Linux)

smbpasswd -a nameOfYourSambaUser

3. Add your shared folder the end of /etc/samba/smb.conf file:

[share name]
path = /yourSharedFolder
writeable = yes
browseable = yes
force user = nameOfYourSambaUser

You need to give permissions for yourSambaUser to access yourSharedFolder:

chown -R nameOfYourSambaUser /path/to/yourSharedFolder

If you want access without password, replace “force user = nameOfYourSambaUser” with: guest ok = yes

4. Restart samba service:

sudo service smbd restart

xrdp on lubuntu without black srceen

Ive got black screen when tried connect to linux from Windows Remote Desktop Connection. Solution on Lubuntu 18.04:

  1. install xrdp server:
    sudo apt install xrdp
    sudo systemctl enable xrdp
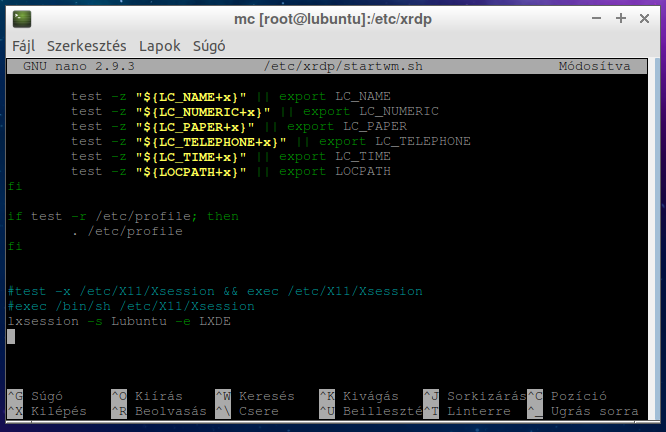
  2. In the /etc/xrdp/startwm.sh, you will need to comment (#) the last two lines and add at the bottom of the file, the following line, and SAVE:
    lxsession -s Lubuntu -e LXDE

  3. Finally restart xprdp:
    sudo /etc/init.d/xrdp restart

CD ripped with EAC: “There were errors” in log file

Currently I using Exact Audio Copy v1.5 and after ripping (almost with every CD) I get “There were errors” message at the end of .log file. All tracks quality is 100% and crc values are same.

8 track(s) accurately ripped
1 track(s) could not be verified as accurate

Some tracks could not be verified as accurate

There were errors

End of status report

With settings:

Used drive  : HL-DT-STDVDRAM GH24NSD1   Adapter: 1  ID: 0

Read mode               : Secure
Utilize accurate stream : Yes
Defeat audio cache      : Yes
Make use of C2 pointers : No

Read offset correction                      : 6
Overread into Lead-In and Lead-Out          : Yes
Fill up missing offset samples with silence : Yes
Delete leading and trailing silent blocks   : No
Null samples used in CRC calculations       : Yes
Used interface                              : Native Win32 interface for Win NT & 2000
Gap handling                                : Appended to previous track

I came to the conclusion it caused by accurate rip does not identify corretctly the last track.

Solution:
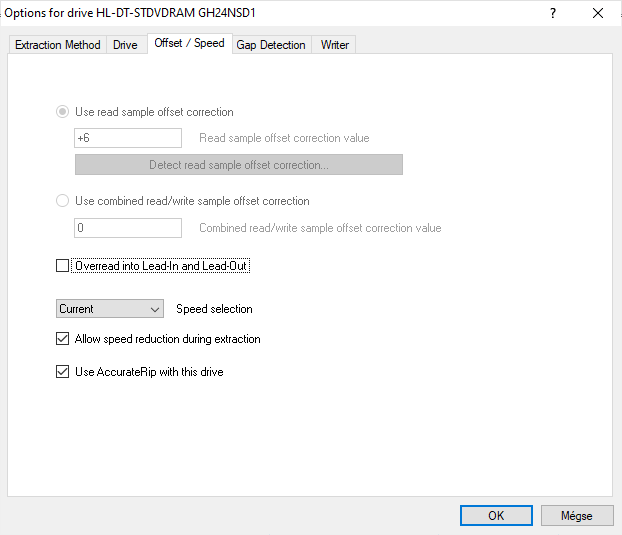
If your CD drive offset value positive (+ number) you need to disable Overread into Lead-In and Lead-Out in EAC/Drive options/Offset-Speed menu.

After disabling overread I ripped again the CD, and I get:

All tracks accurately ripped

No errors occurred

End of status report

message in log file.
 

WordPress HTTPS without plugin

Here’s a simple solution to setup WordPress HTTPS without any third party plugin:

    1. Install your SSL certificate. Most cases your host provider has free SSL so you can activate in your cpanel.
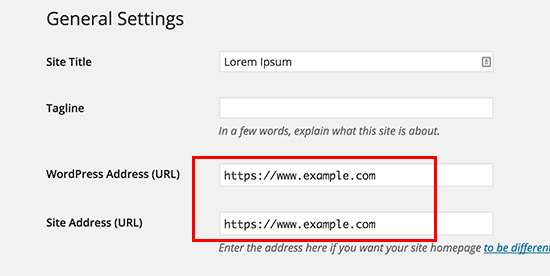
    2. Update your website’s address. Replace http:// with https:// in WordPress Settings/General menu.
    3. Editing your .htaccess file. Navigate to public_html folder to edit your .htaccess file. Insert this rules into your file, and save:
RewriteCond %{HTTPS} !on
RewriteRule (.*) https://%{HTTP_HOST}%{REQUEST_URI} [R=301,L]
    1. Fixing mixed content warnings. If you get mixed contet warning message from your browser add this line to the top of your .htaccess file:
Header always set Content-Security-Policy: upgrade-insecure-requests
  1. Done. Now your site use HTTPS protocol.